Managing Rules
Creating a Rule
To create a rule:
- Navigate to the Rule Editor section of the dashboard
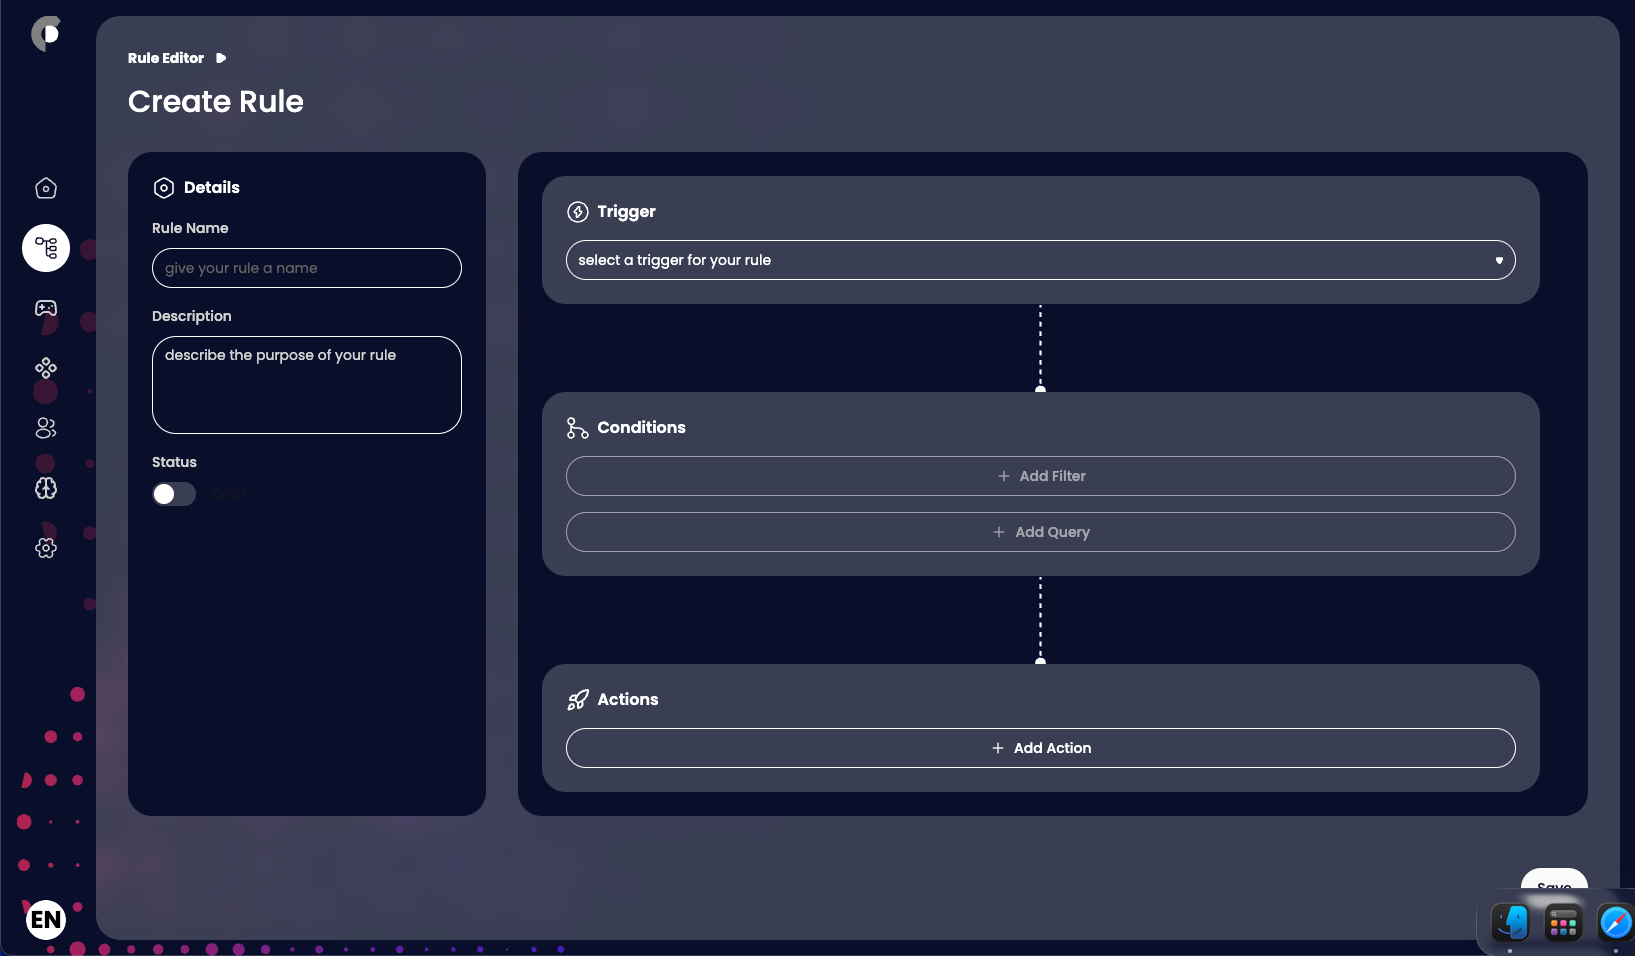
- Click on the Create Rule button to open the rule creation page.
- Fill in the required fields:
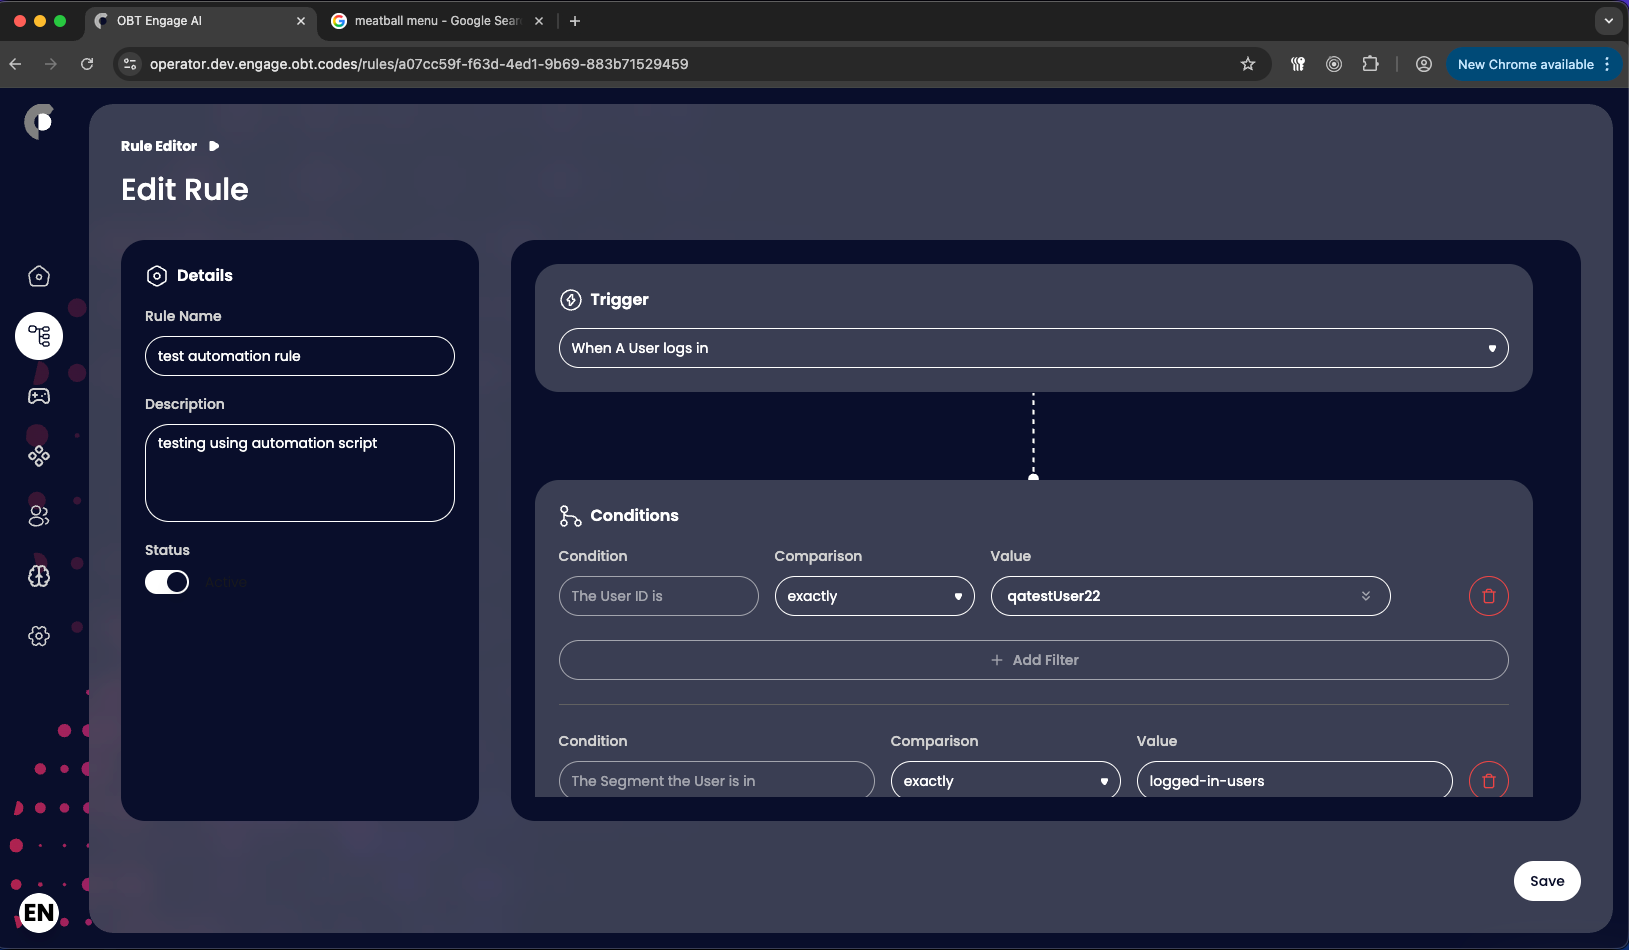
- Rule Name: Friendly name for the rule. This is what will be displayed in the dashboard.
- Description: A brief description of the rule. This is optional but recommended for clarity.
- Status: Toggle between Disabled and Enabled. By default, rules are created in a disabled state.
- Trigger Event: The event that will trigger the rule. This could be an action taken by the user, such as completing a mission or having an attribute value change.
- Conditions: Define the conditions that must be met for the rule to be triggered. You can use logical operators (AND, OR) to combine multiple conditions.
- Filters: Select the filters that will be applied to the incoming event. For example, if the triggering event is "user completes a quiz," you can filter by quiz ID.
- Queries: Define the queries that will be used to evaluate the conditions. This could include checking attribute values, membership of other segments, or other criteria.
- Actions: Define the actions that will be taken when the rule is triggered. This could include updating an attribute, or enrolling a user in a mission.
- Click on the Save Rule button to create the rule.
Edit a Rule
- Navigate to the Rule Editor section of the dashboard
- Click on the Edit button next to the rule you want to edit.
- Edit the Rule settings as needed.